This article is part of Virtue Media’s Web Pros Series. In this series, we feature articles from our team of experts here at Virtue Media. Our Product Managers, Linux Administrators, Marketers, and Tech Support engineers share their best tips for getting the most from your website.
Running digital ads for your business isn’t difficult or especially expensive. You can set up your first Google Ads campaign in just a few minutes and spend just a few dollars a day. (In fact, if you sign up for Virtue Media’s Hatchling Plan, you’ll have a $100 Google Ads credit you can use to get started.)
To have the biggest impact with your Google Ads, there are a few things to know before you get started. In this post, we’ll walk through the process of setting up your first Google ad—from the planning stage all the way through analytics.
Keyword planning is the key to successful ad campaigns
Before you start building your first ad, think about the keywords that people use to find your website. It’s best practice to choose a grouping of keywords that are most relevant to your business. Google Ads will let you use up to 10 keyword phrases per ad.
If you’re not sure which keywords to use, you can try Google Keyword Planner. Type in a few keywords or your website’s URL and Google will give you a list of suggestions.
It’s best to include your business name as a keyword, too, because that can help people find your specific business in search results. (Also, if you don’t use your business name as a keyword but your competitors do use it, they could outperform you in search results–even searches for your business.)
Answer Google Ads’ questions to set the stage for your first campaign
With your keywords, go to ads.google.com and login with your Gmail account or create a Google account. Google’s going to ask you a few questions as you get started.
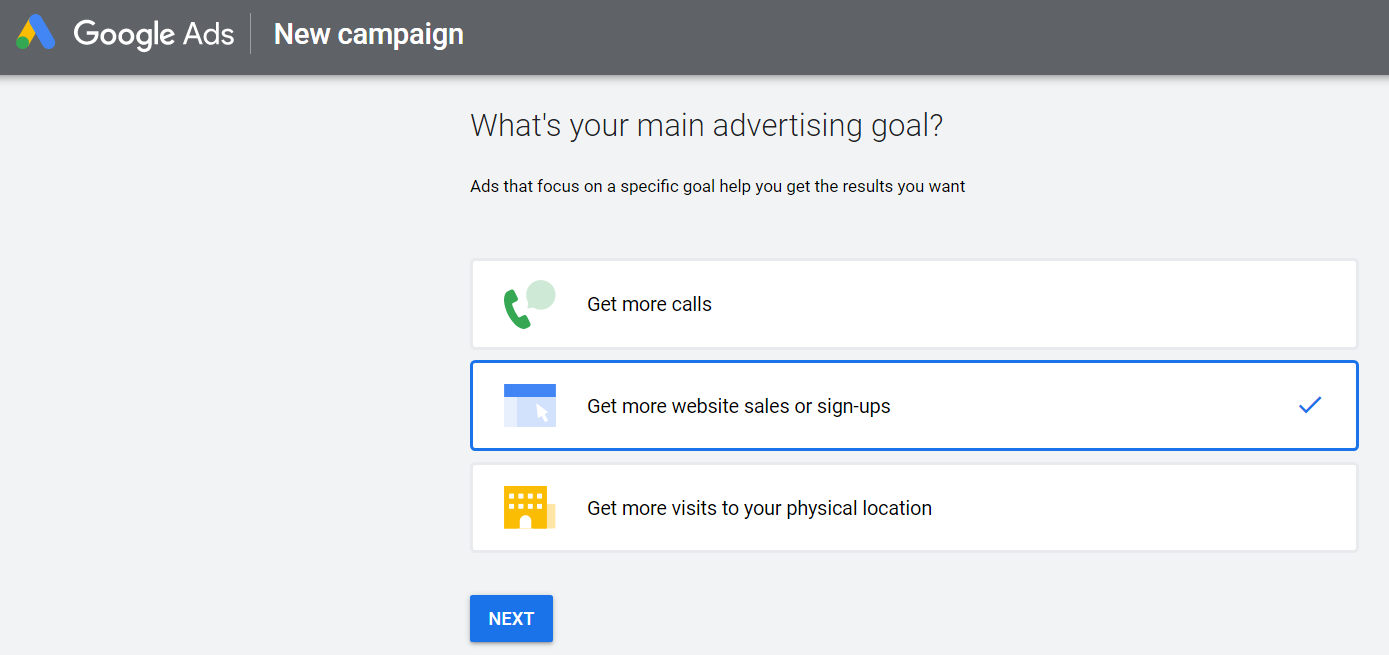
What’s your main goal?
Do you want more people to call your business, visit your website or come to your brick-and-mortar store? Choose one goal for now. You can always create ads with different goals later.
Where are your customers?
You get to choose the geography you would like to target. That could be an area as small as a single ZIP code and as big as an entire country.

What are your keywords?
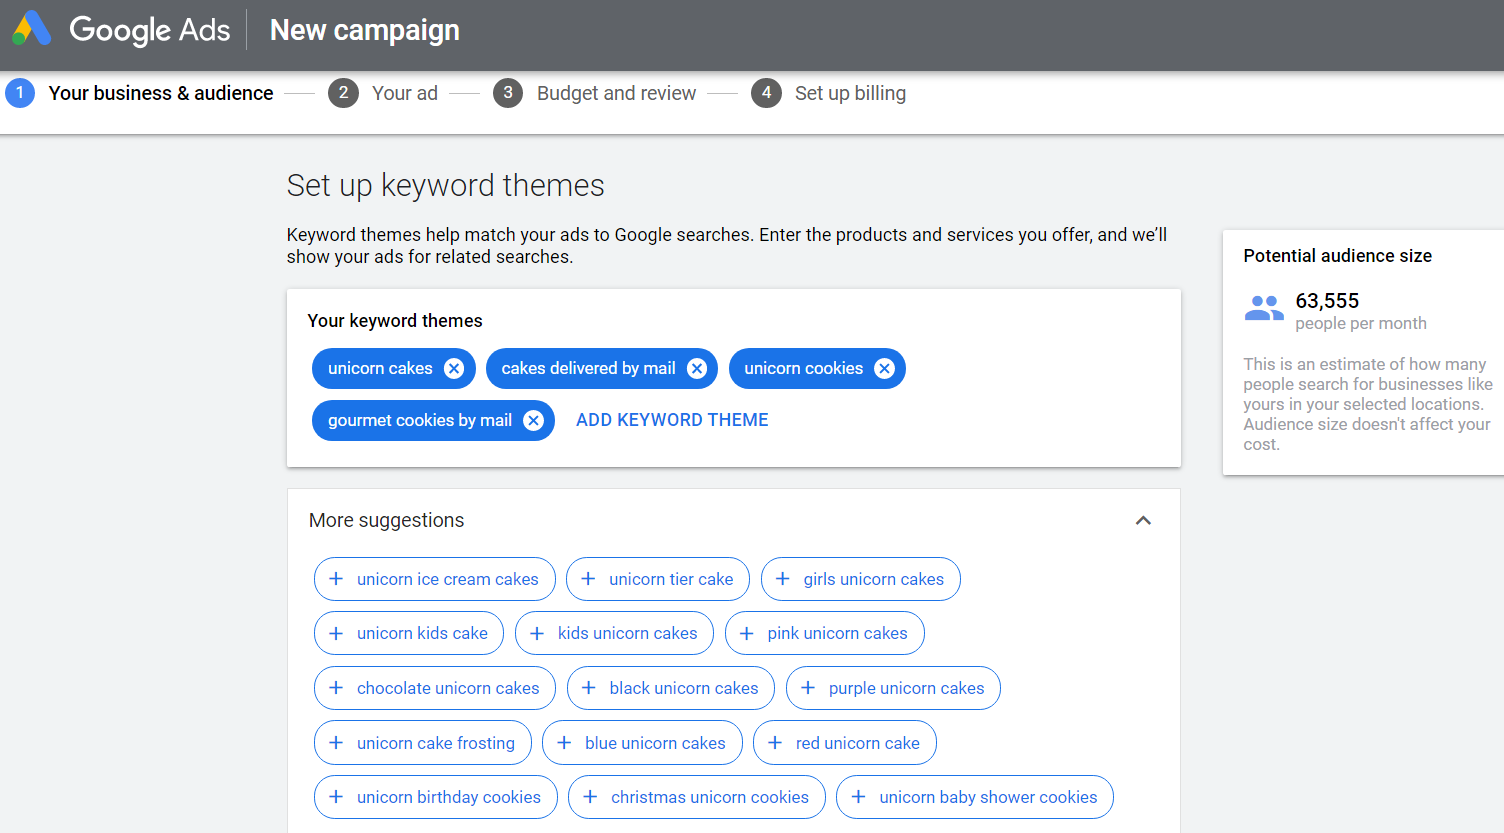
Here’s where your keyword research matters. Click ‘add keyword theme,’ type in the keywords you’ve chosen, and Google will suggest more related keywords.
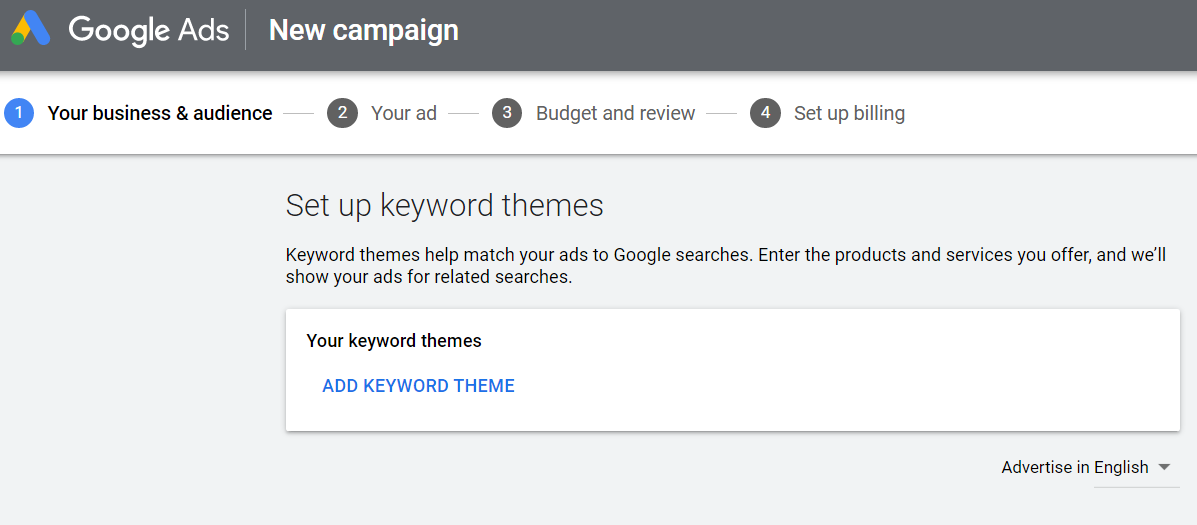
You can have as many as 10 keywords per theme. Each theme will help match your ads to related searches.
Write the headlines and descriptions for your ad
After you have your keyword theme set up, it’s time to move on to the next step: writing the headlines and descriptions for your first Google ad.
Headlines
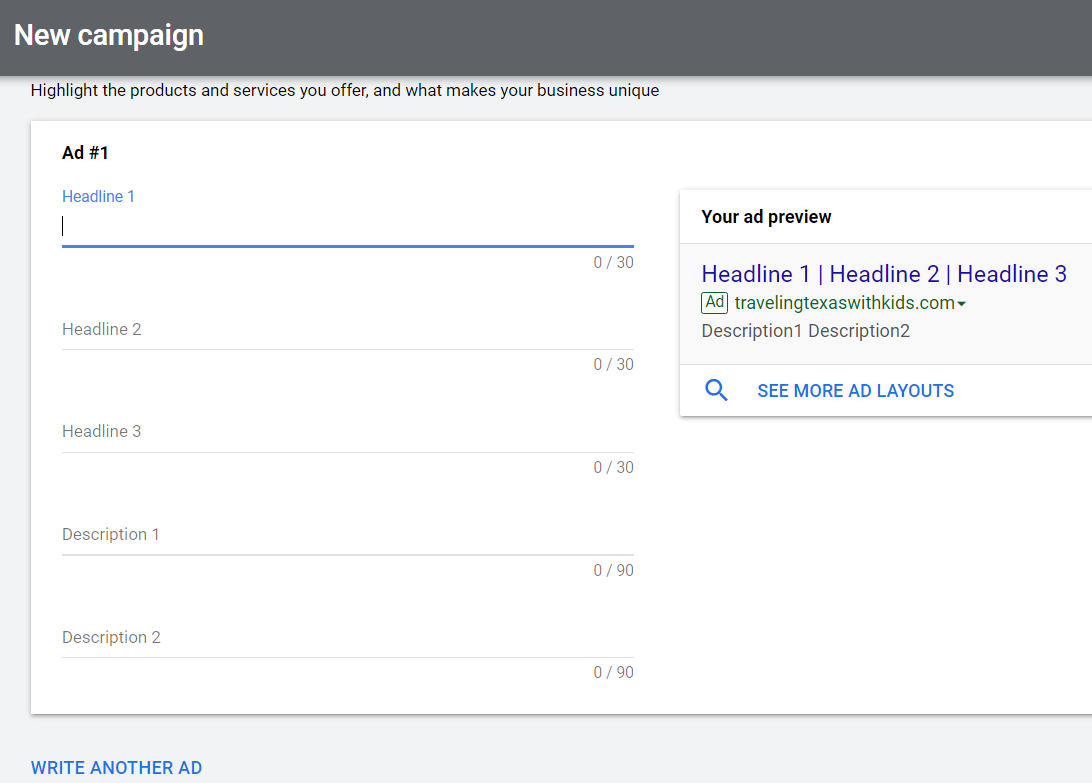
The headlines are the blue clickable sections of your ad. Your ad can have three headlines, each with up to 30 characters. One of those headlines should be your business name.
Description
After the headlines, there’s the description, which is smaller text. You have two description lines at up to 90 characters each. That may seem like a lot of space to fill but go ahead and take it.
Why? The more space your ad takes up on a page, the less room there is for your competitors’ ads.
One way to fill out your ad description is to offer a promotion, something with a strong call to action that gives people an incentive to click the ad and visit your site. For example, “20% off all t-shirts today only.”
URLs
The next text element is your display URL. Your ad will automatically display your main URL in green. It’s not clickable, and it’s basically there to let the customer know what website the ad will take them to.
To get to your website, they’ll click on your headlines. For this, you’ll want to add the URL that you are actually sending them to in the field marked ‘final URL.’ This may be different from your display URL.
For example, if your ad focuses on one of your products or services, your final URL should be the relevant category page, landing page or product page. This helps create the shortest possible path between your ad and what the customer is looking for. That makes it more likely that they’ll convert.
Consider using extensions
You can extend the information you include in each ad with—extensions. You’ll find these tools on the left page menu under Ads & extensions.
Sitelink extensions let you include more links in your ad copy to different pages on your site. Callout extensions let you feature special deals or services. In this example, the callouts show the company’s free shipping, customer service hours and price matching policy.

Choose your maximum daily ad budget
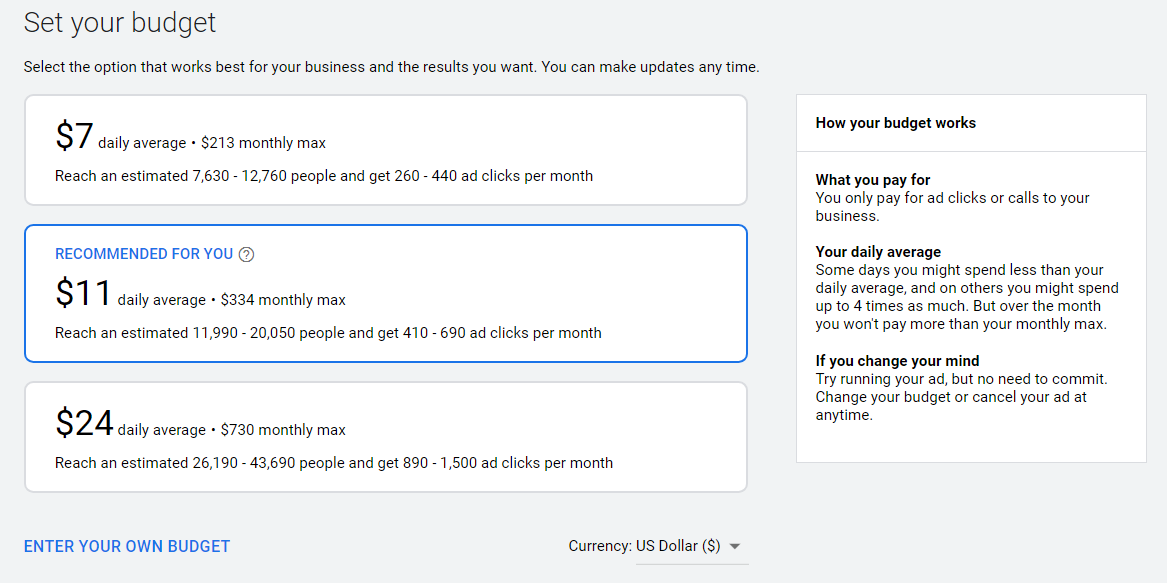
Google will suggest some daily average rates for you, based on your keywords, audience size and goals. For each budget tier, you can see about how many views and clicks your ad should get per month.
You can also set your own budget if you don’t like the options Google gives you.
Set the dates you want your campaign to run
You can pick a start and end date for your campaign. You can also pause your campaign or adjust the end date after your campaign begins.
Check out your ad before you submit it
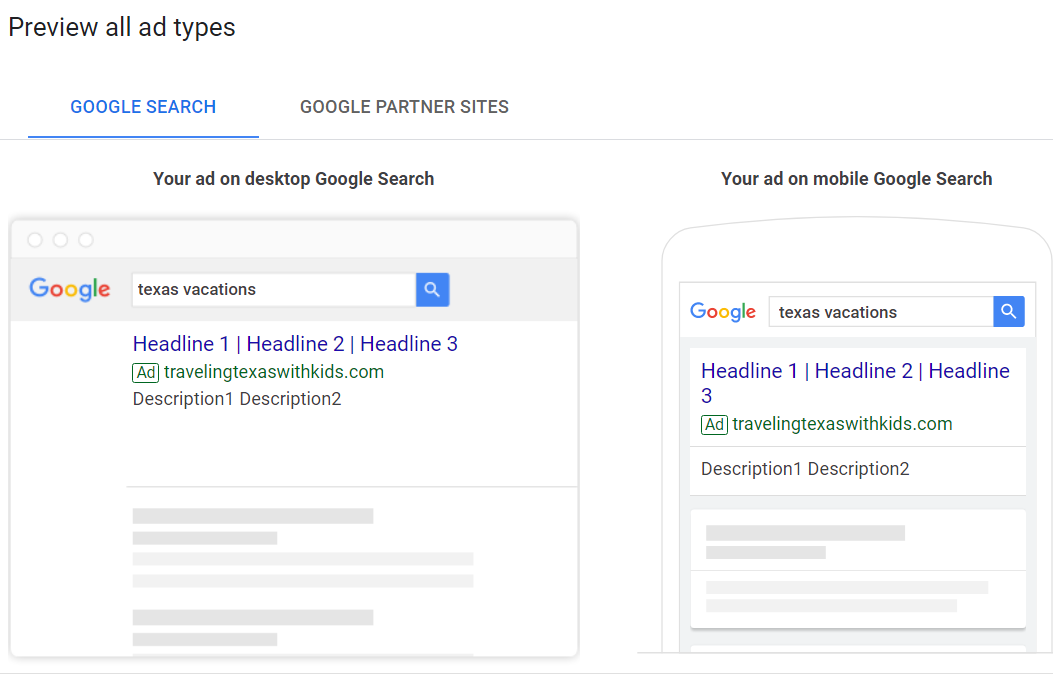
Once everything’s filled out, you’ll be able to see how your ad will look in mobile and desktop search results and on Google Partner websites. If you’re not happy with how it looks—or if you spot a typo—now’s the time to go back and make changes.
Submit your ad for approval
Your ad doesn’t go live right away. Once you submit it, it goes into a queue for editorial approval. That’s where Google makes sure that the ad meets their standards and follows Google Ads policies.
It usually takes less than 24 hours for Google to approve your ad. If for some reason your ad doesn’t get approved, they’ll let you know why so you can try to correct the problem.
Create more ads on the same theme and see which ones do best
Once you’ve created and submitted that first ad, you’re not done. It’s a best practice to create three to five ads based on the same keywords and geography, so you can track and compare their performance.
How? Once you start getting traffic from the ads, keep an eye on the click-through rates for each ad in your Google Ads overview or dashboard. The click-through rate is the percentage of impressions that lead to clicks.
After you collect enough data over a few days or weeks, the ads with higher click-through rates are the ones you’ll want to stick with. And that’s it – your first Google Ad campaign is up and running.
Want more help setting up and running your Google Ads campaigns? Our team of PPC experts is ready to help you.



![Yes, B2B Websites Can Use Personalization Too [Here’s How]](https://mdvirtue.com/wp-content/uploads/2022/02/Yes-B2B-Websites-Can-Use-Personalization-Too-Heres-How-400x250.jpeg)

0 Comments